“Setup” is one of those words that gets used the way people use “handmade” or “organic.” or “ADHD”
It can mean:
- a measured, repeatable process that makes your guitar feel like it’s on rails…
or - someone looked at it, shrugged, lowered the saddles until it buzzed slightly, and gave it back like they did you a favor.
I work on broken stuff all day. The funny part is: most of it isn’t “broken.” It’s just drift. Tiny changes stacked up until your guitar starts acting like it has opinions.
So here’s the truth-teller version: what a real professional setup actually includes. Point-by-point. Microscope-level. The “before & after” walk through. The checklist you can bring to any shop and ask, politely, like a civilized person with standards.
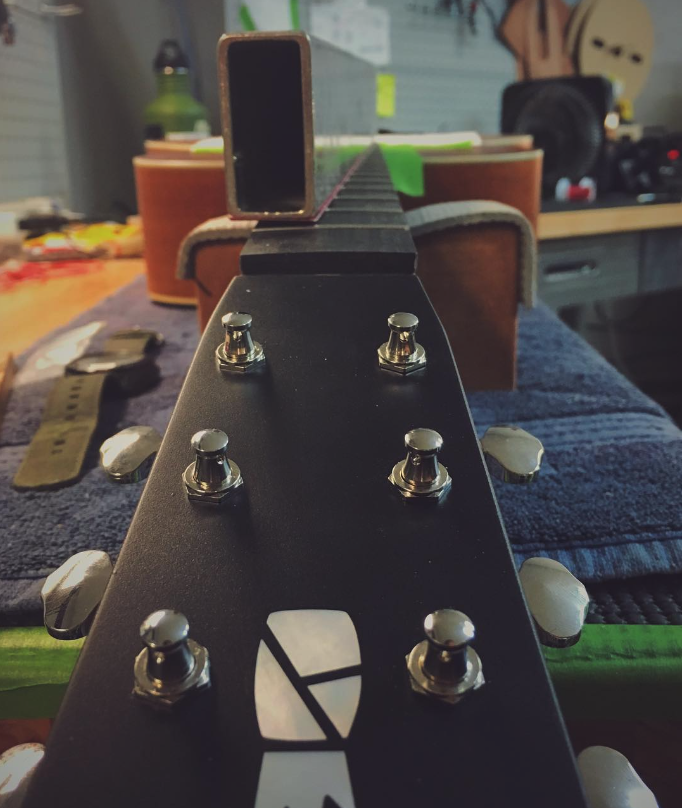
First: what a setup actually is
A proper setup is not “lower action.”
A proper setup is bringing the entire playability system back into alignment:
- neck relief
- nut slots (friction + height)
- bridge/saddle height
- intonation
- hardware stability
- tuning stability
- play-test across the neck (EVERY FRET)
- documented measurements (so you’re not guessing later)
If a shop can’t tell you what they measured before and after, they didn’t do a setup.
They prayed over it.
Nothing against prayer but this is a material matter nothing spiritual.
The Pro Setup Standard
Phase 1 — Intake: “What are we solving?”
A real setup starts with questions, because instruments don’t live in a vacuum.
We ask (or you should be asked):
- What string gauge are you using right now?
- Standard tuning? Drop tuning? Half-step down?
- Light touch or heavy hand? (I generally ask the player to play in front of me so I can see how they play. Some people are oblivious.)
- Pick attack: polite / medium / “I hate this guitar”?
- What’s the symptom: buzz, tuning drift, dead notes, stiff feel, choking bends?
- What’s the goal: lower action? more stability? no buzz? better intonation?
Red flag: “We’ll just do our standard setup.”
That’s how you get a setup that’s perfect for someone else.
Phase 2 — Baseline: Measure reality (before touching anything)
This is where the rip-offs get exposed. Because measuring takes time. And time is what people skip when they’re “fast.”
The “Before” measurements (typical)
(Not all apply to every instrument, but a pro checks what’s relevant.)
Tuning & strings
- Confirm tuning pitch
- Confirm string gauge and condition
- Confirm the strings are installed correctly (yes, really)
- you have no idea how shitty people are at putting strings on. It blows my mind every time I see a rats nest on each tuning peg.
Neck relief
- Measure relief at the proper point (commonly around the 7th–9th fret area)
- Note: relief target depends on playing style + string gauge + instrument. Generally .005″-.008″
Action
- Measure action at the 12th fret (bass and treble side)
- Note whether action drift looks seasonal or structural
Nut behavior
- Does it “ping” while tuning?
- Are there binding points?
- Do strings return to pitch after bends?
- Do the slots look dirty?
Fretboard/frets
- Quick scan: wear divots, high fret suspicion, sharp fret ends
- Buzz map: where it buzzes (open strings vs fretted notes, one zone vs everywhere)
Bridge + hardware
- Saddle travel (is there room to adjust?)
- Trem angle/return-to-zero (if applicable)
- Loose screws, tuner bushings, strap buttons, jack plates (rattle gremlins)
Electronics (quick sanity check)
- Output jack stable?
- Pots scratchy?
- Pickup selector behaving?
Acoustics:
- Humidity clues, top movement, bridge lift check, neck angle symptoms
- (acoustics can “setup drift” into “structural issue” quietly.)
What you should get: a real “before” snapshot—numbers and observations.
I’ve been there before though.
Someone pops in during SXSW and they need something done in a hurry. So I grabbed the gear and started going to town. It works in a pinch but it really doesn’t serve the greatest good.
Phase 3 — Order of operations (this is the craft)
Here’s the rule most “setups” break:
You adjust in the correct order, or you’re chasing your tail.
The usual order:
- Neck relief
- Nut friction / nut function
- Bridge/saddle height (action)
- Intonation
- Re-check everything after it settles
- Play-test (chromatic scale, every string and every fret)
- Final polish/QC
If someone adjusts intonation before the neck and action are stable, that’s like putting icing on cake batter.
Just don’t.
Phase 4 — Neck relief: the quiet kingpin
Relief is the foundation. Get this wrong and everything else becomes an argument.
What a pro actually does:
- Adjusts incrementally
- Lets things settle
- Re-checks measurements
- Matches relief to how you play
Red flags:
- Big turns without re-measuring
- “It felt about right.” (after 20 years in the business you can say this but most people don’t have that luxury).
- Forcing a truss rod (this is how tragedies begin)
Phase 5 — Nut: tuning stability lives here
If your guitar won’t stay in tune, the nut is often the villain wearing an innocent hat.
What a pro checks:
- Are slots binding? (pinging, jumping, returning sharp/flat)
- Are slots the correct depth/shape for the gauge?
- Is the string breaking angle clean?
- Is there evidence of weird past “slot work” (a common crime)?
What a pro might do (depending on need):
- clean/optimize slots
- correct friction points
- recommend nut work if it’s truly wrong (not just “new strings needed”)
Red flag: “Tuning problems? Just stretch your strings more.”
Sometimes yes. Often no. Nut friction feels like “bad luck” until it’s fixed.
Phase 6 — Action: lower, but not stupid
Everyone wants low action. Nobody wants low action that’s got a heavy buzz like you at your last boring work party.
What a pro does:
- Sets action to the lowest reliable point for YOUR playing style
- Balances both sides, considers fret condition, considers relief, considers attack
Red flags:
- Lowering until it buzzes, then saying “that’s normal”
- Not play-testing bends up high
- Not checking open-string behavior separately from fretted buzz
Phase 7 — Intonation: the truth up the neck
Intonation is a reality check.
What a pro does:
- Sets intonation after relief/action are stable
- Checks across multiple positions
- Ensures saddle travel isn’t maxed out
- Notes any limiters: old strings, worn frets, nut issues
Red flag: “Your intonation is perfect.”
Perfect is for math. Real instruments live in tolerances (cents really)anywhere from +\- 2–4 cents is industry standard.
Phase 8 — Rattle hunt + hardware sanity
A pro setup includes hunting the tiny nonsense that ruins your relationship with the instrument.
Common culprits:
- tuner nuts
- strap buttons
- pickguard screws
- bridge height screws
- trem springs
- jack plate
- loose saddle pieces
This part is un-glamorous. That’s why it gets skipped. It’s also why you pay a pro.
Phase 9 — Play-test like you mean it
This is where the setup proves itself. Not on the bench. In actual playing.
A real play-test includes:
- Open chords (do they ring clean?)
- Barre chords (does it fret clean without death-grip?)
- Single-note runs up the neck (dead spots, warbles)
- Bends above the 12th (choking / fretting out)
- Aggressive attack test (if you play hard)
- Tuning stability test (tune → bends → re-check)
- “Buzz map” confirmation (did it move? is it gone? is it acceptable?)
If there’s no play-test, it’s not a setup. It’s a parts adjustment.
Phase 10 — Documentation: the “peace of mind” step
This is the part nobody expects, but everyone benefits from:
After measurements recorded (example list):
- relief (before/after)
- action at 12th (before/after)
- notes on nut function (binding or clean)
- intonation notes (within tolerance, any constraints)
- any findings (high fret suspicion, structural concerns, humidity issues)
Because here’s the truth: six months from now, your guitar will drift again—because time exists. Documentation turns future confusion into clarity.
Before & After Walkthrough (example)
Let’s pretend you bring in a guitar and say:
“It plays stiff, it buzzes a little, and it won’t stay in tune.”
Before (what we might find)
- Relief: a bit high (neck bowed forward more than ideal)
- Action: crept up at the 12th
- Nut: G string “pings” while tuning
- Random rattle: loose tuner bushing
- Intonation: off because relief/action drifted
Work performed (in order)
- Tune baseline and confirm strings/gauge
- Set relief incrementally + re-check
- Optimize nut friction behavior (as appropriate)
- Set action to your playing style (low and reliable)
- Set intonation
- Tighten the tiny rattle gremlin
- Play-test across the neck, bends included
- Record after measurements + notes
After (what you should feel)
- It frets easier
- It stays in tune better
- Buzz is either eliminated or reduced to “only when you hit like a gorilla,” which is a choice
- Notes ring more evenly
- The instrument feels predictable again (this is the real luxury)
“Setup” red flags (aka: how people get ripped off)
If your “setup” experience includes any of these, you’re allowed to raise an eyebrow:
- No questions about your strings, tuning, or playing style
- No measurements before/after
- “We lowered the saddles and adjusted the truss rod” (only)
- You pick it up and they can’t tell you what changed
- They didn’t play it—or only played one cowboy chord and nodded like a sommelier
What you can safely ask a shop (without being a jerk)
Try:
- “What do you measure before and after?”
- “Do you play-test bends up high?”
- “How off was my intonation?”
- “If you find a structural issue, how will you document it?”
Good shops love this question set. Bad shops hate it because it exposes them.
The honest addendum:
Sometimes the guitar needs more than a setup—usually because:
- frets are worn or uneven (fret level time)
- there’s a high fret causing localized choking
- nut slots are wrong enough to require replacement
- an acoustic has neck angle/bridge/top issues
- or the worst of all, you have monkey hands and cause all the intonation problems you hear.
- *I had to learn this one early on as a new luthier.*
A setup is maintenance. Not magic. A real pro tells you the difference without selling you a myth.
I might be a mystic in my personal faith. When it comes to your guitar, you don’t need faith. You need facts.